


Friday, August 29, 2008
enable the advance performance setting in windows vista
If you have noticed that the speed of your system is very slow with windows vista then today tip is very useful for you to increase the performance of windows vista. There is some default setting in vista which is used to manage the write caching on disk. By default windows enabled the write caching on disk but the advanced performance setting is disabled.
Follow the given steps to configure the advance performance setting in Windows Vista:
To enable this feature, you will need to be logged into your computer with administrative rights.
First right click on My Computer icon then select the option Manage.

Here small windows will appear with title Computer Management, now select the Device Manager option, then locate the SATA Disk under the Disk Drives.

Here select the enable advanced performance sittings on the SATA disk.

Now click on Ok button to apply the setting and restart your computer after any changes to go into effect.
increase the Browsing and Downloading speed in Windows Vista
With windows Vista you have noticed the slow internet speed. The web browsing and downloading speed is very slow as compare to previous versions of windows. You can open the same sites in windows XP and server 2003 with the normal speed.
Follow the given steps to increase the Vista browsing speed:
First go to Advance tab in Internet Explorer and turn off the TLS (Transport Layer Security) encryption option. Here to fix problem with some secure pages turn on the SSL 2.0 (Secure Sockets Layer) feature and click Ok button to close it.

Follow the major fix for this problem:
In windows Vista, the TCP autotuning feature is enabled by default. Some web servers do not respond properly to this feature, so it appears that some sites open with very slow speed.
To use this feature, you will need to be logged into your computer with administrative rights.
First click on Start button and type CMD in Run option then press Enter.
At Command Prompt, type the following command and press enter.
netsh interface tcp set global autotuninglevel= disabled
This command will disable the TCP autotuning feature. Now close the command Prompt and restart your computer after any changes to go into effect.
You can easily restore these setting by typing the following command at Command Prompt.
netsh interface tcp set global autotuninglevel= normal
Now close the command Prompt and again restart your computer after any changes to go into effect.
Monday, August 25, 2008
Recycle as Much as You Want
You can increase and decrease the size of the Recycle Bin. There are some size limitations with Recycle Bin size, its default size is equivalent to 10 percent of the drive size. But if you delete a larger size file accidentally, you can retrieve this file from Recycle Bin that is why you should set the maximum storage size of the Recycle Bin.

- First Right click on the Recycle Bin icon on the Desktop of your computer then go to Properties.
- Adjust the slider bar in the center of the screen from 10% to maximum size as you want.
- Then click OK button to save your new sitting and exit the Recycle Bin Properties Window.
- After change reboot your computer to have Windows fully initiate the necessary changes to your system.

Write A Batch File To Start Program In Startup
You can start your computer applications automatically and control the sequence of the programs when your computer comes up.
Here we consider you want to run three different applications (WordPad, calculator, and notepad) and minimized automatically with sequence at windows startup. However, you can write a batch file to do the job for you. Open any text editor like notepad and type the following command.
start /min wordpad.exe start /min calc.exe start /min notepad.exe
Now choose the option, Save As to save this file with .bat extension. For example filename.bat.
Now Right- click on Start button and choose open > Double click Programs > here open Startup folder. Now drag your .bat file in the Startup folder and close the dialog box.
Next time When you restart the computer, WordPad, Calc will start first and then Notepad. You won't see the batch file run because you told it to run minimized.
Task Manager running but hidden from view
If you are using Windows Task Manager to display the information about programs and processes that are running on your computer. You can start your Windows Task Manager with pressing Ctrl+Alt+Delete keys or with pressing Ctrl+Shift+Esc keys.
To keep Task Manager hidden when it is minimized.

To keep Task Manager hidden when it is minimized.
- First open it by pressing Ctrl+Alt+Delete keys then go to Options menu and click on Hide When Minimized.
- You can easily restore it, if you click on the icon of Task Manager that will appear in taskbar near the time display.

Safer Registry Editing
Make sure before modifying your system Registry about its backup and you need to know how to organized the registry, how to perform the basic editing, because Registry contains all information how your system runs. This backup will help you to restore Registry in case any problem occurs after modifying. Learn how you can Export and Import Registry File before Editing?
You can backup the whole Registry and only Registry subkeys also.
Click Start Button then type regedit in Run dialog box and click Ok button. Here you can backup the whole Registry or you can locate the required subkeys that contain the information that you want to edit.
Go to File menu option then click on Export option for backup and save it with on any your system drive with .reg extension and you can restore this backup going File menu using import option.
Removing Add/Remove Programs Entries From RegEdit
Generally we use Add/Remove programs option in Control Panel to remove any unwanted program from our computer. Normally this may be due to poorly designed uninstaller with this program. That is why some programs may not be removed properly and a reference to this program remains in the computer registry. This reference in registry may be creating problems to run your computer smoothly. Here you need to delete this reference to edit your computer registry using RegEdit editor.
- First go to Start button and open Run dialog box. Type here RegEdit and press Enter.
- Now in editor Navigate to the given path
- HKEY_LOCAL_MACHINE\SOFTWARE\Microsoft\Windows\CurrentVersion\Uninstall.
- Here locate the entry created by your program with its name and select that entry from the list on the left panel and delete its key.
- Close the Registry Editor and restart your computer, the program will be removed from your computer permanently.
Using REGEDIT With Safety
Make sure before modifying your system Registry about its backup, because Registry contains all information how your system runs. This backup will help you to restore Registry in case any problem occurs after modifying. Learn how you can Export and Import Registry File Before Editing?
You can backup the whole Registry and also its subkeys.
Click Start Button then type regedit in Run box and click Ok button. Here you can export the whole Registry or you can locate the required subkeys that contain the information that you want to edit.
Go to File menu option then click on Export option for backup and save it with on any your system drive with .reg extension and you can restore this backup going File menu using import option.
Close All Windows Programs quickly
A cool tip to minimize and maximize all your active windows programs. You can do all using your mouse, but if you want to do this with keyboard then simply press Windows key+M to minimize all active programs and later maximize it using Windows key+Shift+M.
If you want to minimize the all active windows programs one by one then use the shortcut by pressing Alt+Space+N keys and sequentially maximize the active windows programs using shortcut Alt+Space+X keys.
If you want to minimize the all active windows programs one by one then use the shortcut by pressing Alt+Space+N keys and sequentially maximize the active windows programs using shortcut Alt+Space+X keys.
Turn Your Num Lock On Forever
You can set your Num Lock to stay on by default when you logon your system.
There are two different techniques to set Num Lock stay on by default.
If you can use Registry Editor correctly then Click on start button and type Regedt32.exe in Run command. Here Navigate to HKEY_USERS\.Default\Control Panel\Keyboard and change the value for InitialKeyboardIndicators from 0 to 2.
You can do same by configuring the script to change the NUM LOCK state. Click Start button and then open Notepad. Copy the giving code and paste in Notepad.
set WshShell = CreateObject("WScript.Shell")
WshShell.SendKeys "{NUMLOCK}"
Now save this file with name "num.vbs" must including the quotes. At the end copy this file to user startup folder. The path for this folder is Documents and Settings\All Users\Start Menu\Programs\Startup.
Now restart the computer. Num Lock should come on and stay on.
New Monitors can give life to an older computers
If you want to upgrade your computer, the new monitor is the easiest way to upgrade your computer, because if you have old monitor with new PC, your monitor slow down the system to download image on the screen. The main change with new monitor is the increased screen resolution, fast refresh rates in which a monitor will refresh a image on the screen.
If you want to change the refresh rate of your monitor, Right click on Desktop > Properties > Settings then open Advanced options. Here on the Monitor tab, go to Refresh Frequency list, Here you can change your Monitor frequency with new refresh rate. The default frequency setting of old monitor is 60 Hertz, but your monitor may support more than 60 hertz. First check your monitor manufacturer documentation about your monitor supports. The higher refresh rate reduces the flicker problem on your screen.

If you want to change the refresh rate of your monitor, Right click on Desktop > Properties > Settings then open Advanced options. Here on the Monitor tab, go to Refresh Frequency list, Here you can change your Monitor frequency with new refresh rate. The default frequency setting of old monitor is 60 Hertz, but your monitor may support more than 60 hertz. First check your monitor manufacturer documentation about your monitor supports. The higher refresh rate reduces the flicker problem on your screen.

Take More Control Over Your Computer's Boot Process
You can set the boot time in windows XP as your wish if you are install two operating systems on same computer, for example window 2000 with windows XP or more than two. Yow can do this with editing Boot.ini file. Here you can also set the sequence for operating system which operating system boot first.
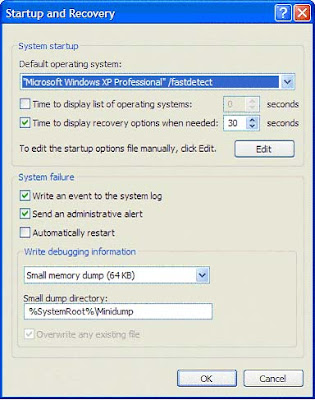
First Right Click on My Computer option and then select its Properties. In next dialog box open Advanced tab button. Under Startup and Recovery, click on the Settings button. Use the spin box "Time to display list of operating systems" to set the number of seconds you want the system to wait before automatically starting the default operating system. Here you will set time in seconds and its range start from 0 and ends with 999 seconds.
After set the time, then click OK option to close the dialog box to save your change. The next time you restart, the new time will take effect.

Export and Import Registry File Before Editing
An important tip about the back up of your system Registry. Make sure before modifying your system Registry about its backup because Registry contains all information how your system runs. This backup will help you to restore Registry in case any problem occurs after modifying.
You can backup the whole Registry and also Registry subkeys.
Click Start Button then type regedit in Run box and click Ok button. Here you can export the whole Registry or you can locate the required subkeys that contain the information that you want to edit.
Go to File menu option then click on Export option for backup and save it with on any your system drive with .reg extension and you can restore this backup going File menu using import option.
Enable Toggle Keys of your Systems
Toggle Keys option designed for those people who are typing while looking away from the screen or for those who are vision impairment. When your system Toggle keys is turned on, you will get a special sound when special keys are pressed like CAPS, NUM, SCROLL LOCK keys.
To enable or disable your system Toggle keys, go to Control Panel using Start button. In your system Control Panel normally the first option will be Accessibility options. Double click on Accessibility options and check the Toggle keys box, Windows will automatically send you a special beeps when you will press locking keys.

To enable or disable your system Toggle keys, go to Control Panel using Start button. In your system Control Panel normally the first option will be Accessibility options. Double click on Accessibility options and check the Toggle keys box, Windows will automatically send you a special beeps when you will press locking keys.

Dragging and Dropping Program Files in the Start Menu
Perhaps the most commonly asked question from readers of these tips is how to sort the Programs menu in alphabetical order.
Once again, the trick is to go to Start, Programs and then make sure that you move your cursor to the right, so that your cursor is inside the actual list of programs.
Then you just right-click and choose Sort By Name.
This works with Favorites, too.
Please note that in both these cases, unfortunately, new programs and Favorites are always added to the bottom of the list, so you'll have to re-sort them later.
You can also drag and drop the shortcuts in the list of programs, just in case you want to move the most frequently accessed programs to the top.
Just go to Start, Programs and then click and hold on a program or folder. Drag it and release to move it where you like.
Print and Edit Through DOS Mode
If you are working at the Command Prompt your can modify and print the text file very easily. There are different ways to print text a file while working at the Command Prompt. Assuming the file you want to print is in your current folder, you can type here with your file name with extension. For example
print filename.txt
and press Enter. Here .txt is the file extension. You must use the extension. Now in the same way you can edit this file before printing with given command
edit filename.txt
and press Enter. This command opens the MS-DOS Editor to edit this file. Edit the file and then press Alt, F, P to print it.
Disable or Enable Auto run CD in Windows XP
In windows XP you can enjoy a good feature to run CD or DVD automatically when you loaded it into you CD drives on your computer. This is a defaults feature in windows XP but you can disable and enable it according to your nature of work. In user interface mode there is no option to disable or enable this feature, you must edit the registry of windows and be careful to work registry.
Click Start button then type regedit in Run option then press Enter for next.
Here locate the location to:
HKEY_LOCAL_MACHINE\SYSTEM\CurrentControlSet\Services\Cdrom
Here you can disable or enable automatically running your CD. Change the value of Autorun to 0 for disable and change the value to 1 for enable. At the end restart your computer for this change.
run the system info utility in Windows XP
This tip is windows XP related command to verify the system secret information. You can view detail information's about your system processor, Bios, Available Physical Memory, OS Configuration, networking information, installed hot fixes and System up Time.
Follow the given steps to find out some interesting details about XP Professional:
First click on Start button and type cmd in Run option then press Ok button to display the Command Prompt.

Now at the command prompt type systeminfo command and press enter.
After execution of this command, systeminfo gives the following info on my PC at home:

Control all open windows using windows shortcut keys
A cool tip to minimize and maximize all your active windows programs.
You can do all using your mouse, but if you want to do this with keyboard then simply press Windows key+M to minimize all active programs and later maximize it using Windows key+Shift+M.
If you want to minimize the all active windows programs one by one then use the shortcut by pressing Alt+Space+N keys and sequentially maximize the active windows programs using shortcut Alt+Space+X keys.
Sunday, August 17, 2008
Windows XP TIPS
Unlocking WinXP's setupp.ini
How do I get the "Administrator" name on Welcome Screen?
Fix Movie Inteferance in AVI files
Create a Password Reset Disk
Change Web Page Font Size on the Fly
WinXP Clear Page file on shutdown
Forgetting What Your Files Are?
Temporarily Assign Yourself Administrative Permissions
Create a Shortcut to Lock Your Computer
Create a Shortcut to Start Remote Desktop
Instantly Activate a Screensaver
Add a Map Drive Button to the Toolbar
Software not installing?
Use your Windows Key
Change your cd key
Remove the Shared Documents folders from My Computer
Rip high-quality MP3s in Windows Media Player 8
Speed up the Start Menu
Add/Remove optional features of Windows XP
Remove Windows Messenger
How you can save Energy using Energy saving feature
You can save your system energy applying these feature.
First Right click on our your system desktop and a popup menu will appear.
Select the Properties option from the menu.
Click Screen Saver tab and then select Power button, here you will get Power saving sitting option for your monitor.
Select your power scheme from available option, for example turn off monitor time, turn off hard disk and stand by your system.
At the end Click OK button to apply the selected scheme.
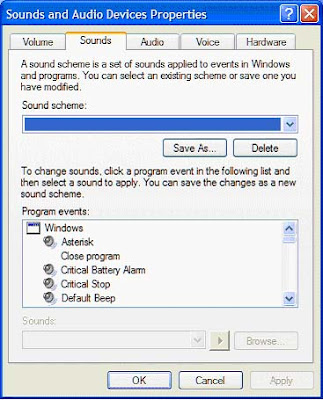
How to Choose The Sounds For Each Windows Event
Here is a cool tip to choose the sounds for each windows event, you can get these sounds files using windows special sound folders but you can add sounds from any third source.
First Click on Start button, Control Panel and then Click the Sounds and audio devices icon.
Click on sounds option , select it and then click Browse button.
After clicking browse option you will go c:\WINNT > Media or Sounds folder (windows default sounds folder), but you can add sounds here from any third source.
Simply locate here the sound file you want to associate with the selected event and double-click it.
Now you can play this sound file in preview to observe if your like the sound file or not.
Click OK, and then Click OK again to close the dialog box.

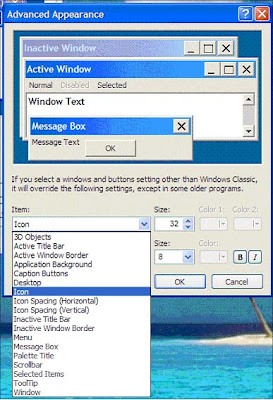
How you Changing the Icon Spacing in XP
You can manage your desktop icons in windows XP horizontally as well as vertically spacing. You can change the location, size of icons and spacing between icons manually but you can arrange these setting using windows methods.
First Right click on your windows XP desktop then click on Properties option. Here click the Appearance tab then go to Advance button and under Item you will find many options to change the desktop icons, for example choose icon spacing in both ways and then here you can change the size putting number (minimum or maximum) under size. When you finished all setting then click ok button.
First Right click on your windows XP desktop then click on Properties option. Here click the Appearance tab then go to Advance button and under Item you will find many options to change the desktop icons, for example choose icon spacing in both ways and then here you can change the size putting number (minimum or maximum) under size. When you finished all setting then click ok button.
How to login with multiple ID's at the same time in Yahoo messenger
If you have multiple yahoo ID's and wants to login with more than one yahoo ID at the same time then don't worry, you can login with more than one yahoo ID at the same time using this tip. There is no need to install any other yahoo multi messenger version, you can easily covert your normal yahoo messenger into multi messenger and enjoy your many ID's at the same time.
Follow the given steps to change the yahoo messenger registry value:
Click Start button and type regedit in Run option then press Enter for next.

Here locate the location to:
HKEY_CURRENT_USER/Software/Yahoo/Pager/Test
Here in right side panel, right click to create a new Dword value with name Plural and give it value 1.
Now close the registry editor and restart your computer after any changes to go into effect.
For signing in with new YAHOO ID open another messenger open as many messengers you need.
If you want to disable the multiple messenger option then again open registry editor and change Plural value 1 to 0.
Follow the given steps to change the yahoo messenger registry value:
Click Start button and type regedit in Run option then press Enter for next.

Here locate the location to:
HKEY_CURRENT_USER/Software/Yahoo/Pager/Test

Here in right side panel, right click to create a new Dword value with name Plural and give it value 1.

Now close the registry editor and restart your computer after any changes to go into effect.
For signing in with new YAHOO ID open another messenger open as many messengers you need.
If you want to disable the multiple messenger option then again open registry editor and change Plural value 1 to 0.

How to logoff your computer automatically after a period of inactivity
Today tip will help you to log off your computer automatically after some specific period of inactivity. Because most of the users left logged on their computer may represent a security threat for the company. For this purpose, first install the Winexit.scr tools that includes in Windows 2003 Resource Kit (rktools.exe) and you can free download it from Microsoft site.
To use this feature, you will need to be logged into your computer with administrative rights.
After installing the rktools.exe setup, locate the Winexit.scr file in the following location.
C:\Program Files\Windows Resource Kits\Tools
Here right click no Winexit.scr file and select the Install option.
A Display Properties dialog box will appear, select Screen Saver tab and choose "Logoff Screen Saver" entry under the Screen saver area.
Now click on Setting button, again a small dialog box will appear with the title "WinExit Setup Dialog".
Here select the "Force application termination" check box under the "Force logoff" area
and type the number of seconds in "Countdown for n seconds" box under Time to logoff area.
Now type the message that appears during the logoff countdown timer in the "Logoff Message" box
and click on Ok button.
Click on "Preview" button to verify the settings.
Here a small dialog box will appear with the title "Auto logoff in progress", it displays the countdown
timer and logoff message.
Click on Cancel then Ok button to finish the process.
To use this feature, you will need to be logged into your computer with administrative rights.
After installing the rktools.exe setup, locate the Winexit.scr file in the following location.
C:\Program Files\Windows Resource Kits\Tools

Here right click no Winexit.scr file and select the Install option.
A Display Properties dialog box will appear, select Screen Saver tab and choose "Logoff Screen Saver" entry under the Screen saver area.

Now click on Setting button, again a small dialog box will appear with the title "WinExit Setup Dialog".

Here select the "Force application termination" check box under the "Force logoff" area
and type the number of seconds in "Countdown for n seconds" box under Time to logoff area.

Now type the message that appears during the logoff countdown timer in the "Logoff Message" box
and click on Ok button.

Click on "Preview" button to verify the settings.
Here a small dialog box will appear with the title "Auto logoff in progress", it displays the countdown
timer and logoff message.

Click on Cancel then Ok button to finish the process.
How to disable auto-start applications on windows startup
Using this tip, you can minimize the startup time of windows XP and Vista also. You can disable some optional windows applications like windows messenger, Yahoo messenger, QuickTime and many others auto startup programs that run automatically when you start your computer.
Follow the given steps to disable the windows auto run applications:
To use this feature, you will need to be logged into your computer with administrative rights.
Click Start button and type msconfig in Run option then press Enter for next.
A small System Configuration Utility dialog box will appear with many options like General, System.ini Win.ini, Boot.ini, Services, Startup and Tools.
Now select Startup tab and uncheck the applications that you want to disable from windows startup.
Now click on Apply button to implement the changes then click on Ok button to end the configuration process.
Again close the all program and restart your computer after any changes to go into effect.
Follow the given steps to disable the windows auto run applications:
To use this feature, you will need to be logged into your computer with administrative rights.
Click Start button and type msconfig in Run option then press Enter for next.

A small System Configuration Utility dialog box will appear with many options like General, System.ini Win.ini, Boot.ini, Services, Startup and Tools.
Now select Startup tab and uncheck the applications that you want to disable from windows startup.

Now click on Apply button to implement the changes then click on Ok button to end the configuration process.
Again close the all program and restart your computer after any changes to go into effect.
How to start windows programs quickly with Run Command
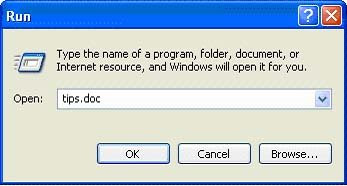
The run option of Start menu is used to run a program or to open a document directly. If you do not know the exact location of the program or document then click on Start button to open Run and type the programs shortcut name to open it directly.
Run Commands
appwiz.cpl -- Used to run Add/Remove wizard
Calc --Calculator
Cfgwiz32 --ISDN Configuration Wizard
Charmap --Character Map
Chkdisk --Repair damaged files
Cleanmgr --Cleans up hard drives
Clipbrd --Windows Clipboard viewer
Control --Displays Control Panel
Cmd --Opens a new Command Window
Control mouse --Used to control mouse properties
Dcomcnfg --DCOM user security
Debug --Assembly language programming tool
Defrag --Defragmentation tool
Drwatson --Records programs crash & snapshots
Dxdiag --DirectX Diagnostic Utility
Explorer --Windows Explorer
Fontview --Graphical font viewer
Fsmgmt.msc -- Used to open shared folders
Firewall.cpl -- Used to configure windows firewall
Ftp -ftp.exe program
Hostname --Returns Computer's name
Hdwwiz.cpl -- Used to run Add Hardware wizard
Ipconfig --Displays IP configuration for all network adapters
Logoff -- Used to logoff the computer
MMC --Microsoft Management Console
Msconfig --Configuration to edit startup files
Mstsc -- Used to access remote desktop
Mrc -- Malicious Software Removal Tool
Msinfo32 --Microsoft System Information Utility
Nbtstat --Displays stats and current connections using NetBIOS over TCP/IP
Netstat --Displays all active network connections
Nslookup--Returns your local DNS server
Osk ---Used to access on screen keyboard
Perfmon.msc -- Used to configure the performance of Monitor.
Ping --Sends data to a specified host/IP
Powercfg.cpl -- Used to configure power option
Regedit --Registry Editor
Regwiz -- Registration wizard
Sfc /scannow -- System File Checker
Sndrec32 --Sound Recorder
Shutdown -- Used to shutdown the windows
Spider -- Used to open spider solitaire card game
Sfc / scannow -- Used to run system file checker utility.
Sndvol32 --Volume control for soundcard
Sysedit -- Edit system startup files
Taskmgr --Task manager
Telephon.cpl -- Used to configure modem options.
Telnet --Telnet program
Tracert --Traces and displays all paths required to reach an internet host
Winchat -- Used to chat with Microsoft
Wmplayer -- Used to run Windows Media player

Wab -- Used to open Windows address Book.
WinWord -- Used to open Microsoft word
Winipcfg --Displays IP configuration
Winver -- Used to check Windows Version
Wupdmgr --Takes you to Microsoft Windows Update
Write -- Used to open WordPad
Run Commands
appwiz.cpl -- Used to run Add/Remove wizard
Calc --Calculator
Cfgwiz32 --ISDN Configuration Wizard
Charmap --Character Map
Chkdisk --Repair damaged files
Cleanmgr --Cleans up hard drives
Clipbrd --Windows Clipboard viewer
Control --Displays Control Panel
Cmd --Opens a new Command Window
Control mouse --Used to control mouse properties
Dcomcnfg --DCOM user security
Debug --Assembly language programming tool
Defrag --Defragmentation tool
Drwatson --Records programs crash & snapshots
Dxdiag --DirectX Diagnostic Utility
Explorer --Windows Explorer

Fontview --Graphical font viewer
Fsmgmt.msc -- Used to open shared folders
Firewall.cpl -- Used to configure windows firewall
Ftp -ftp.exe program
Hostname --Returns Computer's name
Hdwwiz.cpl -- Used to run Add Hardware wizard
Ipconfig --Displays IP configuration for all network adapters
Logoff -- Used to logoff the computer
MMC --Microsoft Management Console
Msconfig --Configuration to edit startup files
Mstsc -- Used to access remote desktop
Mrc -- Malicious Software Removal Tool
Msinfo32 --Microsoft System Information Utility
Nbtstat --Displays stats and current connections using NetBIOS over TCP/IP
Netstat --Displays all active network connections
Nslookup--Returns your local DNS server
Osk ---Used to access on screen keyboard
Perfmon.msc -- Used to configure the performance of Monitor.
Ping --Sends data to a specified host/IP
Powercfg.cpl -- Used to configure power option
Regedit --Registry Editor
Regwiz -- Registration wizard
Sfc /scannow -- System File Checker
Sndrec32 --Sound Recorder
Shutdown -- Used to shutdown the windows
Spider -- Used to open spider solitaire card game
Sfc / scannow -- Used to run system file checker utility.
Sndvol32 --Volume control for soundcard
Sysedit -- Edit system startup files
Taskmgr --Task manager
Telephon.cpl -- Used to configure modem options.
Telnet --Telnet program
Tracert --Traces and displays all paths required to reach an internet host
Winchat -- Used to chat with Microsoft
Wmplayer -- Used to run Windows Media player

Wab -- Used to open Windows address Book.
WinWord -- Used to open Microsoft word
Winipcfg --Displays IP configuration
Winver -- Used to check Windows Version
Wupdmgr --Takes you to Microsoft Windows Update
Write -- Used to open WordPad
How to uninstall the windows XP using command prompt
Today tip will help you uninstall the upgraded version of windows XP using the command prompt options. If you have upgraded your operating system from the previous versions of windows 98 Second Edition, or Windows Millennium Edition (Me) and now you wants to revert to the operating system that was previously installed on your computer. Windows XP can be removed by uninstalling from a Command Prompt option in Safe mode because XP includes the Uninstall Windows XP option.
Follow the given steps to revert to the operating system that was previously installed on your computer:
To manage windows XP, first you should log onto your computer with administrative rights.
First boot your system in Safe mode by pressing F8 button at the same time before the windows logo appears.
First click on Start button and type cmd in Run option then press Ok button to display the Command Prompt.
At the command prompt type cd/ command and press enter.
Now again type the command cd\windows\system32 and press enter button. After execution of this command, system will change the previous directory mode.
Now type the command at command prompt osuninst.exe to start the process.
Now on the computer screen, follow the instructions on the screen to begin uninstalling Windows XP from your computer to restore the previous operating system.
Follow the given steps to revert to the operating system that was previously installed on your computer:
To manage windows XP, first you should log onto your computer with administrative rights.
First boot your system in Safe mode by pressing F8 button at the same time before the windows logo appears.
First click on Start button and type cmd in Run option then press Ok button to display the Command Prompt.

At the command prompt type cd/ command and press enter.
Now again type the command cd\windows\system32 and press enter button. After execution of this command, system will change the previous directory mode.

Now type the command at command prompt osuninst.exe to start the process.

Now on the computer screen, follow the instructions on the screen to begin uninstalling Windows XP from your computer to restore the previous operating system.
How to restore the windows XP to a previous working state
Today tip is very useful to recover the windows XP problems and then restore it in previous working state. You can recover the windows critical components and return your computer to earlier state without loss of personal data using windows XP built-in system restore feature. With new programs being installed, viruses infecting and spyware creates problem in your browsers it is not unusual for your computer to suddenly stop behaving correctly. So you can perform the windows recovery process and return your computer to earlier state within a minute.
Follow the given steps to run System Restore wizard:
To use this feature, you will need to be logged into your computer with administrative rights.
First click on Start button> All programs> Accessories> System Tools then click on System Restore.
Now a "Welcome to System Restore" wizard will start, first read the detail instruction on left side of the page.
On right side of the page, click on "Restore my computer to an earlier time" check box under "To begin, select the task that you want to perform" area and then click on Next button.
On the "Select a Restore Point" page, click on bold date option, but try to use a restore
date as close as possible to a time just before the problem started then click on Next
button.
Now a next page will appear with title "Confirm Restore Point Selection", to restore your
computer to this date and time then click on Next button to start the restore process.
Now system restore process recover the previous windows settings and your computer
will restart with "Restoration Complete" message, click Ok button to finish the process.
Follow the given steps to run System Restore wizard:

To use this feature, you will need to be logged into your computer with administrative rights.
First click on Start button> All programs> Accessories> System Tools then click on System Restore.
Now a "Welcome to System Restore" wizard will start, first read the detail instruction on left side of the page.
On right side of the page, click on "Restore my computer to an earlier time" check box under "To begin, select the task that you want to perform" area and then click on Next button.

On the "Select a Restore Point" page, click on bold date option, but try to use a restore
date as close as possible to a time just before the problem started then click on Next
button.

Now a next page will appear with title "Confirm Restore Point Selection", to restore your
computer to this date and time then click on Next button to start the restore process.

Now system restore process recover the previous windows settings and your computer
will restart with "Restoration Complete" message, click Ok button to finish the process.

How to Save a Search for future reference in windows XP
Before reading this tip you have read many tips in means of word "Search" but you will be surprised to read this tip which I have brought for you today. If you regularly execute the same search, for example you are searching for Word documents that include the phrase "command for disaster recovery" ------ you don't need to retype these words again and again when ever you are searching. Here you can save your searching words for future search. If you do advanced searches just like size of file name or date, and execute the same search over and over.
Follow the given steps to save search phrase for future search:
First click on Start button> go to Search then click on "For File and Folders..." option.
Now select the search criteria and perform the search to find any phrase, because you have to run a search before you can save it.
Go to File menu and click on "Save Search" to save search phrase, then choose where you want to save the file.
Normally, Window XP saves the search in your "My Documents" folder, But you can save it in any folder. Actually, if you plan to save a lot of searches; you might want to create a separate folder for them.

When you want to run the search again, find the file and double click on it. When you save a search, Windows XP creates a file named after named after the main criteria of your search. For example, if you search for all .doc files that contain the phrase "command for disaster recovery" and which have been modified in the past month, windows names the file "Files including text command for disaster recovery.find." You can rename the file, but make sure, always ends in the .find extension, for example, "Command for disaster recovery.find".
Follow the given steps to save search phrase for future search:
First click on Start button> go to Search then click on "For File and Folders..." option.

Now select the search criteria and perform the search to find any phrase, because you have to run a search before you can save it.

Go to File menu and click on "Save Search" to save search phrase, then choose where you want to save the file.
Normally, Window XP saves the search in your "My Documents" folder, But you can save it in any folder. Actually, if you plan to save a lot of searches; you might want to create a separate folder for them.

When you want to run the search again, find the file and double click on it. When you save a search, Windows XP creates a file named after named after the main criteria of your search. For example, if you search for all .doc files that contain the phrase "command for disaster recovery" and which have been modified in the past month, windows names the file "Files including text command for disaster recovery.find." You can rename the file, but make sure, always ends in the .find extension, for example, "Command for disaster recovery.find".
How to change the boot Time in window XP
You can set the boot time in windows XP as your wish if you are install two operating systems on same computer, for example window 2000 with windows XP or more than two. Yow can do this with editing Boot.ini file. Here you can also set the sequence for operating system which operating system boot first.
First Right Click on My Computer option and then select its Properties. In next dialog box open Advanced tab button. Under Startup and Recovery, click on the Settings button. Use the spin box "Time to display list of operating systems" to set the number of seconds you want the system to wait before automatically starting the default operating system. Here you will set time in seconds and its range start from 0 and ends with 999 seconds.
After set the time, then click OK option to close the dialog box to save your change. The next time you restart, the new time will take effect.

View previously open Folders after Shutdown or Logoff
If you need to access lot of folders on your home computer or on the network regularly then you can set them re-open automatically, when you will login, shutdown or restart your computer next time. There is no need to open regularly used folders manually, just configure the simple sitting, your computer will automatically reload all the previously opened windows.
By default windows XP disables this option to reload automatically all the previously opened windows, when you login on, shutdown or restart your computer.
Follow the given steps to configure your computer to reload previously opened folders automatically after shutdown.

By default windows XP disables this option to reload automatically all the previously opened windows, when you login on, shutdown or restart your computer.
Follow the given steps to configure your computer to reload previously opened folders automatically after shutdown.
- To edit this feature, you will need to be logged into your computer with administrative rights.
- First click on Start button then go to Control Panel.

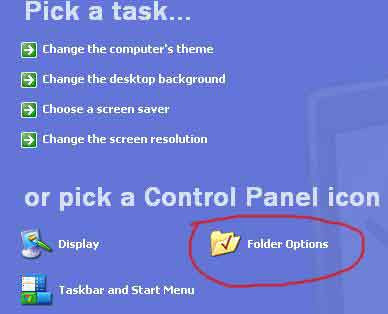
- Open the “Appearance and Themes” option in control panel then click on Folder Options.

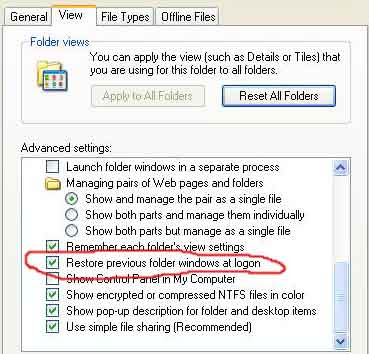
- A small windows dialog box will appear with the title “Folder options”, click on View tab.
- Under the Advanced setting section, scroll down to bottom and click the “Restore previous folder windows at logon” option and then click Ok button to save setting.

- Now when you log off, restart or shutdown, your computer will automatically open the previously opened folders from the same location as before.
add new destinations to "Send To" menu in windows XP
In windows environment, the Send To command is used to transfer files from one location to different locations. By using this command, a user can quickly send his file between default destinations (default lists in Send To menu, for example Desktop, CD/DVD Drive, My Documents, Mail Recipient and Floppy Drive). These are the default Send To menu lists in windows XP. To increase the data transfer speed between different locations, you can add more new destination in Send To lists.
Follow the given steps to add new destinations to Send To lists:
First click on Start button and type sendto in Run option then press Ok button.
A window will appear with default Send To lists (Compressed (zipped) Folder, Desktop (create shortcut), Mail Recipient, My Documents).

Now using drag-and-drop technique (or using copy and paste method), you can move any program, folders and drives shortcuts to this folder.
Now you can verify, your new shortcut is created in Send To menu.
But next times, if you want to delete any destination, then open the Sent To folder and remove the destination shortcut.

Follow the given steps to add new destinations to Send To lists:
First click on Start button and type sendto in Run option then press Ok button.

A window will appear with default Send To lists (Compressed (zipped) Folder, Desktop (create shortcut), Mail Recipient, My Documents).

Now using drag-and-drop technique (or using copy and paste method), you can move any program, folders and drives shortcuts to this folder.

Now you can verify, your new shortcut is created in Send To menu.

But next times, if you want to delete any destination, then open the Sent To folder and remove the destination shortcut.
How to enjoy Windows Media Player using shortcuts keys
In Windows Media Player, you can use the combination of different keyboard keys to accomplish routine task. By using these keys, you can increase the working speed in media player, otherwise require a conventional mouse to select menus and buttons options. Basically keyboard shortcuts keys help you to save time and you can perform any tasks without leaving the keyboard keys.
Shortcut keys Action
ALT+1 -Adjust zoom to 50 percent
ALT+2 -Adjust zoom to 100 percent
ALT+3 -Adjust zoom to 200 percent
ALT+ENTER- Display the video in full mode
ALT+F- Go to media player File Menu
ALT+T -Go to media player Tools Menu
ALT+V - Go to media player View Menu
ALT+P- Go to media player Play Menu
ALT+F4 -Use to close media player
CTRL+1 -Display media player in full mode
CTRL+2 - Display media player in skin mode
CTRL+B -Use to play the previous item in media player
CTRL+F -Use to play the next item in media player
CTRL+E - Use to Eject CD or DVD from CD or DVD drive
CTRL+P -Use to Play or Pause the item in media player
CTRL+T -Use to Repeat the items in media player
CTRL+SHIFT+B -Use to Rewind a file in media player
CTRL+SHIFT+F -Use to Fast Forward a file in media player
CTRL+SHIFT+S -Use to play items slower than a normal speed
CTRL+SHIFT+ G -Use to play items faster than a normal speed
CTRL+SHIFT+ N -Use to play items at normal speed in media player
F8 -Use to mute the volume in media player
F9 -Use to decrease the volume in media player
F10 - Use to increase the volume in media player
ENTER or SPACEBAR -Use to play an item
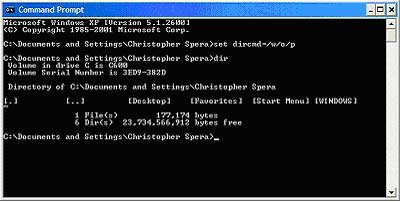
How can Automate the DIR Command
If your are using same switches frequently in Command prompt then open your system command prompt using open Run option
Click Start and open Run option then type cmd to open command prompt, here type
set dircmd=/w/o/p
then press Enter, now every time thereafter that you type
dir
the /w/o/p switches will be automatically applied and now need to type every time. If your are interested to use single switch like /w you can use it
set dircmd=/w
and press Enter.
and same if you wants to undo these switches then you can very easily by typing
dir /-switch
For example, if you wanted to do a directory with only the /w switch, you could enter
dir /-p/-o
When you exit the Command prompt window, however, the Dircmd setting returns to its default settings.

create a System State data backup
Using System State backup technique, you can create the backup of windows critical components on any system drive and this backup file can be used if the original copy is lost, damaged, or destroyed. On windows 2000/XP/Vista, system state data wizard backed up the following components.
But if you are running domain controller, system state data wizard backed up the following components.
Follow the given steps to run System State data backup wizard:
To use this feature, you will need to be logged into your computer with administrative rights.
First click on Start button> All programs> Accessories> System Tools then click on Backup.

Now by default backup wizard will start, click on advanced mode option to change the backup settings.
Here a dialog box will appear with title "Backup Utility", select "Welcome" tab and click on Backup Wizard [Advanced] button to create backup of windows important components.

Click on Next button to continue backup wizard.
Now select option "Only back up the System State date" on what to back up page and click on Next button.
Here click on Browse button to specify the destination for backup file and also set backup file name under "Type a name for this backup" box then click on Next button.
Now verify your selected settings and click on Finish button to start backup process.
- Windows registry
- Windows boot files
- COM+ class registration database
But if you are running domain controller, system state data wizard backed up the following components.
- Active Directory
- System volume (SYSVOL)
- Windows registry
- Windows boot files
- COM+ class registration database
Follow the given steps to run System State data backup wizard:
To use this feature, you will need to be logged into your computer with administrative rights.
First click on Start button> All programs> Accessories> System Tools then click on Backup.

Now by default backup wizard will start, click on advanced mode option to change the backup settings.

Here a dialog box will appear with title "Backup Utility", select "Welcome" tab and click on Backup Wizard [Advanced] button to create backup of windows important components.

Click on Next button to continue backup wizard.
Now select option "Only back up the System State date" on what to back up page and click on Next button.

Here click on Browse button to specify the destination for backup file and also set backup file name under "Type a name for this backup" box then click on Next button.

Now verify your selected settings and click on Finish button to start backup process.

Subscribe to:
Posts (Atom)


